Timely Tactics | 6 Time-saving tips for your account
![]()
We’ve put together some tactical tips for how you can streamline your front of house process with Timely, to make sure you’re putting your best foot forward.

- Create a Timely shortcut
- Add an administrator login
- Connect a receipt printer
- Toggle on/off customer privacy
- Use Service groups
- Raise a product sale from the Calendar
1. Create a Timely shortcut
Load the Timely calendar in your browser with a click of a single button by creating a handy shortcut.
We’ve got all the bases covered with a guide that steps you through how you can easily add Timely shortcuts to the following:
- Add a shortcut to your Windows desktop
- Add a shortcut to your desktop on a Mac
- Install the Timely app on Chrome
- Add Timely as a favourite/bookmark to Firefox, Chrome, Safari and Internet Explorer
Check out our shortcuts guide for more information.
2. Add a single front of house login
Say goodbye to logging out and logging back in between staff members, by adding a separate dedicated login* for reception/front office staff.
Pop over to Setup > Administrators and click Add administrator.
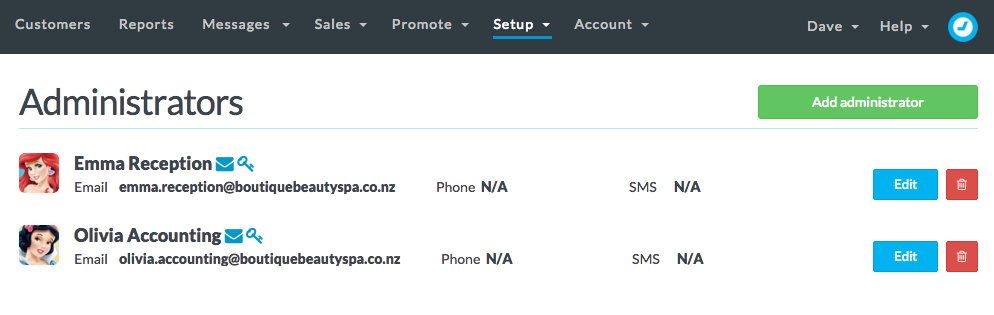
Once you’ve created your administrator, then you can choose which areas (e.g. Calendar, Customers and Sales) of the account they can access under Account > User access.
Check out our guides to find out more about how to add administrative staff and update user access permissions.
*As all staff will be using the same login, make sure to update the Processed by when you apply payments so that the correct staff member/administrator is assigned the payment in the Transaction summary.
3. Connect a thermal receipt printer
Print your customers a copy of their invoice in handy receipt format by connecting a thermal receipt printer to your computer.
Head to Setup > Invoices and taxes and scroll down to the Invoice printing settings to update the Print format for each location.
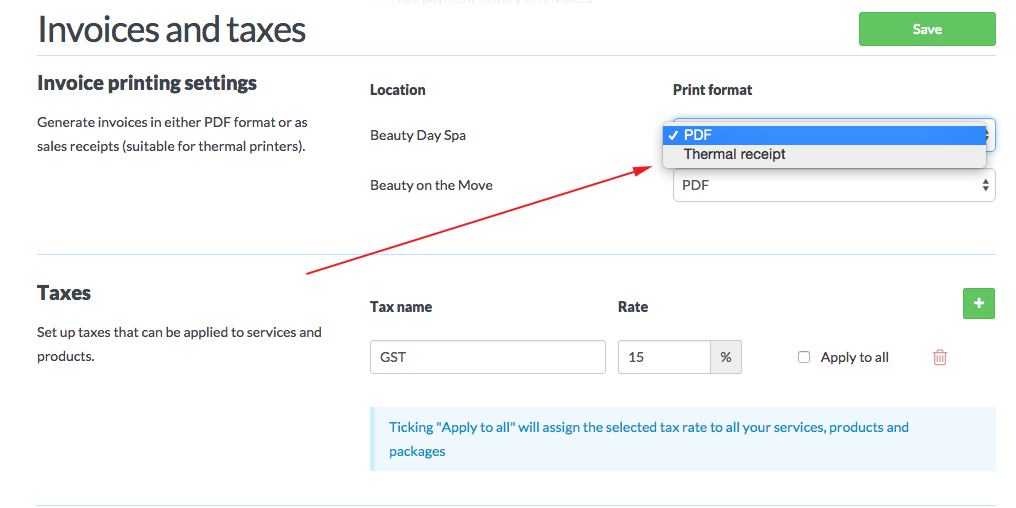
For more detailed step-by-step instructions and configuration tips, check out our How to use thermal receipt printing guide.
4. Toggle on customer privacy
Need to keep your customer details private while viewing the Calendar, or quickly anonymize appointments? Hit ‘b’ while viewing the Calendar to blur out your customer’s names and protect their privacy.
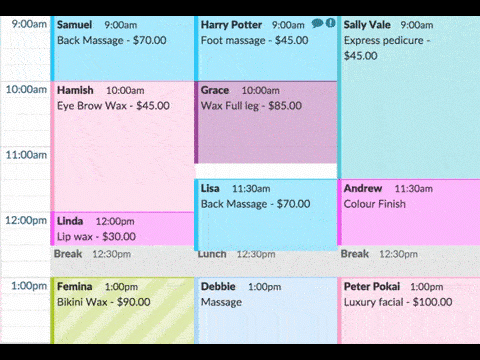
5. Use Service groups
Service groups are a great way to quickly select a group of services to add to an appointment, so you can get back to your clients faster!
Group multiple services that you’d normally perform together, with padding or processing time included.
Head to Setup > Services and click Add service group to set up your service groups.
Find out more in our How to use Service groups guide or check out the video below:
6. Raise a product sale from the Calendar
If a customer walks in off the street or wants to make a one-off product purchase that isn’t linked to an appointment, then you can quickly raise a product sale from the Calendar.
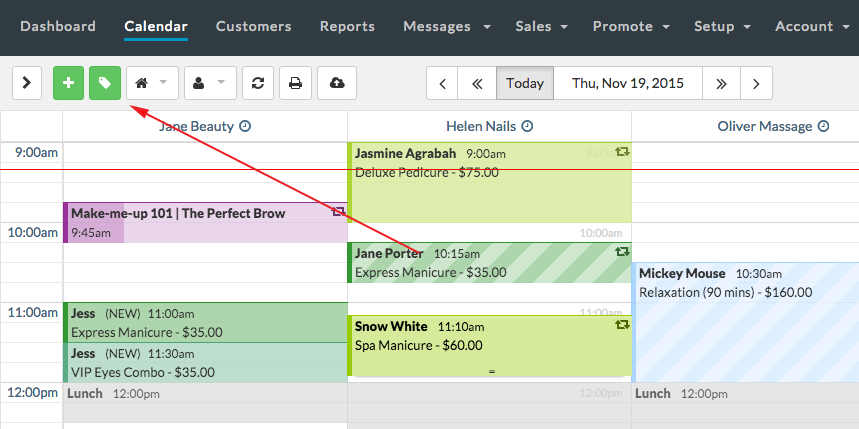
Click the Sale tag button in the top left corner of the Calendar and choose Product from the list.
Select an existing customer, add a new customer or create a generic customer (e.g “Product Sale” or“Walk-in”) and click Save to raise the invoice.
Check out our guide for more information on selling products in Timely.